- Click Start button.
- Click Mail icon
Setup
Please note that not all the screenshots below will apply, depending on if new/existing account is being setup/modified.
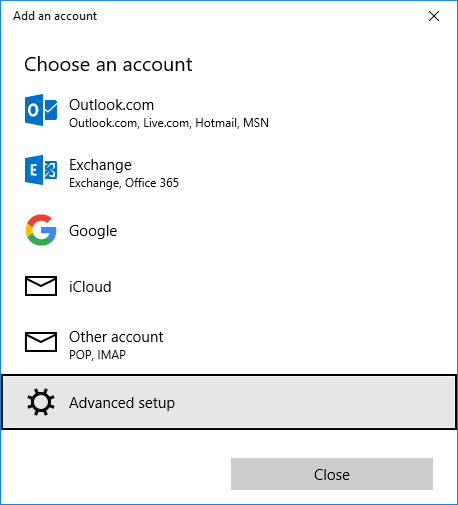
1. Add Account or select "gear" icon
1a. Select Advanced Setup
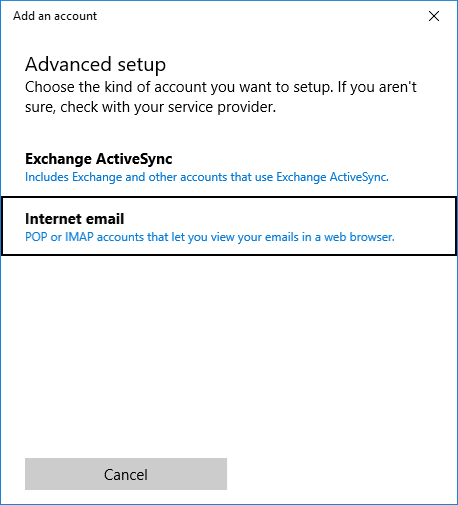
2. Select Internet email
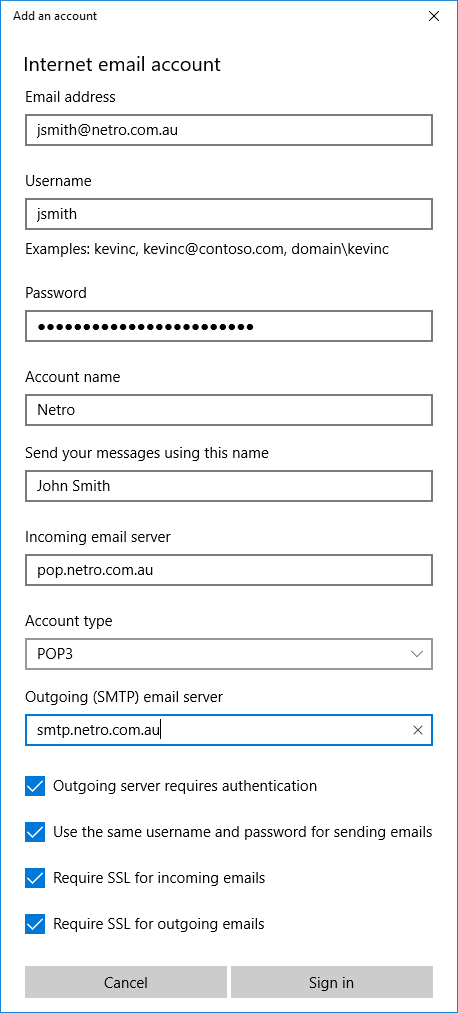
3. Internet email account
- Email address: Replace example with your correct email address
- Username: Replace example userid with yours, excluding the domain "@netro.com.au"
- Password: ******* (Note: Case sensitive)
- Account name: Netro
- Send your messages using this name: Replace example with your real name
- Incoming email server: pop.netro.com.au
- Account Type: POP3 - Outgoing (SMTP) email server: smtp.netro.com.au
- Tick: Outgoing server requires authentication (Default)
- Tick: Use the same username and password for sending emails (Default)
- Tick: Require SSL for incoming emails (Default)
- Tick: Require SSL for outgoing emails (Default)