Netro Support: FTP Uploading
Overview
Please note: For security from Aug-15 we recommend logins via SFTP.
Your files can be uploaded onto our web server via FTP (File Transfer Protocol) with SSL/TLS (FTPS).
FileZilla is a popular free (non Pro version) FTP client available on Windows, MacOS & Linux.
For security unencrypted "plain FTP (insecure)" connections are no longer supported,
please make sure you are running the latest software with the correct settings.
Instructions
These instructions relate to FileZilla 3.27.0.1 and should be similar to other versions or other FTP programs.
After downloading from link above & installing:
1. Setup your FTP connection profile
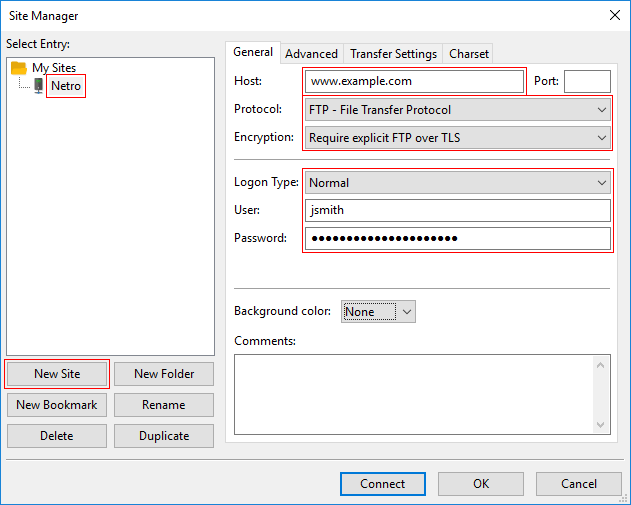
In FileZilla, select: File, Site Manager
Under "Select Entry", select: New Site (if not setup previously)
(a) General tab
Host: e.g. www.netro.com.au (specify your correct site address)
Port: Leave blank (Uses defaults: Explicit 21, Implicit 990)
Protocol: FTP - File Transfer Protocol (default)
Encryption: Require Explicit FTP over TLS
"Require Implicit FTP over TLS" is available on newer servers.
For security, avoid using the default setting: "Use explicity FTP over TLS if available",
since this can fall-back to plain FTP (insecure) mode.
Logon Type: Normal or Ask for password
User & Password: use the details that were supplied by Netro
when your site was first activated, this is often similar to your
primary email address, excluding the domain (e.g. @netro.com.au).
Please make sure your login details are correct to avoid being blocked by our Firewall.
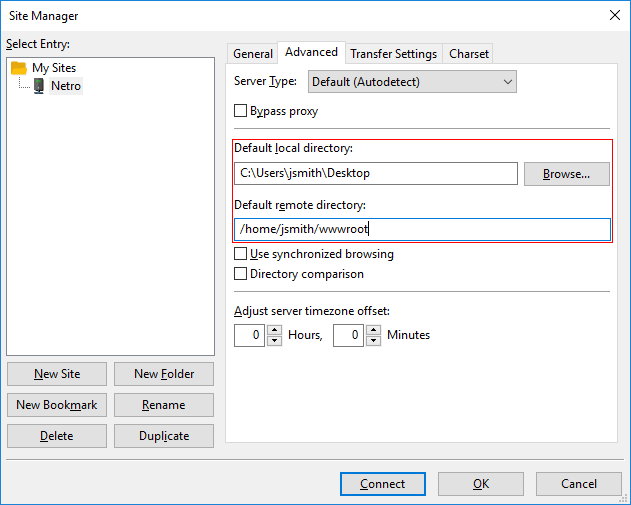
(b) Advanced tab
For convenience:
Default local directory: Specify the location of your files, such as your Desktop or ftp folder.
Default remote directory: Specify your wwwroot upload folder on the Netro server.
remember to substitute example user jsmith with your User ID
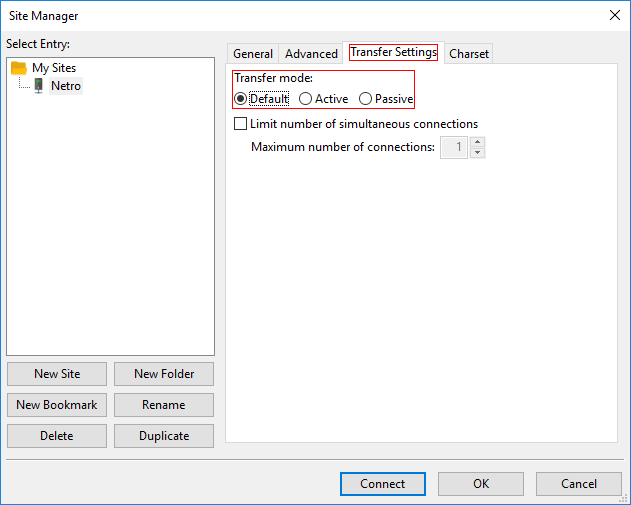
(c) Transfer Settings tab
Transfer mode: Default (Passive)
This works with most NAT (Network Address Translation) enabled routers.
Our passive FTP data requests are typically served from the following Unassigned IANA port ranges:
Explicit FTPS: 8809-8872
Implicit FTPS: 9803-9874
(d) Active mode
Transfer mode: Active
If you require Active (also known as Port) mode, you may need to Port Forward the range on your broadband router,
otherwise you may not be able to show directory listing.
Select Edit, Settings, Active mode:
Tick: Limit local ports used by Filezilla
Lowest Available Port: 6717
Highest Available Port: 6766
A range of 50 ports should be sufficient in most cases, as per the FileZilla
Wiki.
Please make sure these ports don't conflict with other programs,
at the time of writing this range was unassigned by the IANA (Internet Assigned Numbers Authority):
Service Name and Transport Protocol Port Number Registry

2. Open your upload folder
Hit Connect button
then change to your upload folder such as wwwroot which contains your web site files.
3. Upload your files
Please remember that your default home or start page should be called default.htm, which should be all lower case.
Files are normally transferred in binary mode, however if you are uploading PERL or PHP scripts, use text.
To transfer a file, double click.
4. Test your site
Enter your web page address:
such as: http://www.netro.com.au/
If the updated page is not appearing, Try Ctrl-Refresh
If you are still getting an error, make sure you have uploaded the file into the right directory
5. Troubleshooting
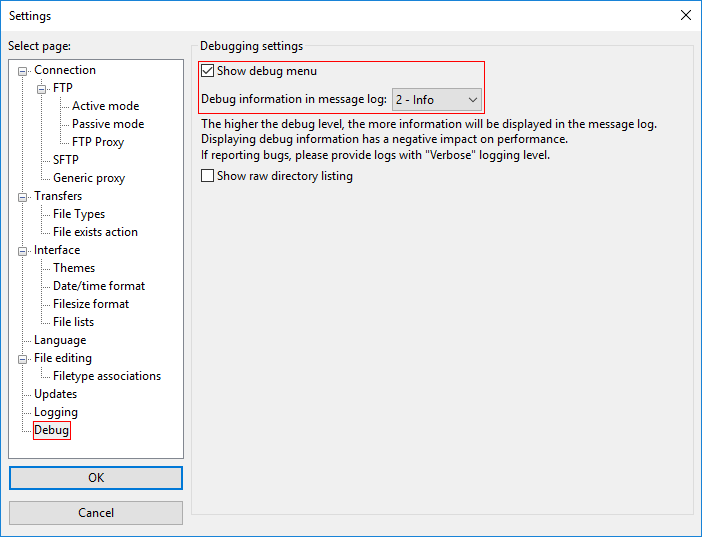
Select: Edit, Settings
(a) Debugging settings:
Debug information in message log: 2 - Info
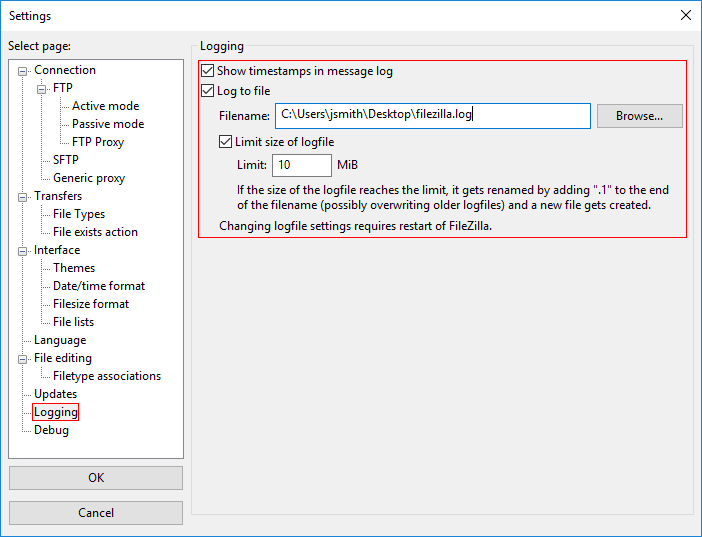
(b) Logging
Log to file: e.g. C:\Users\userid\Desktop\Filezilla.log
References:
FileZilla Wiki includes Documentation & FAQ.
Wikipedia: FileZilla
Wikipedia: FTP
Wikipedia: IANA
Related Links:
Diagnostics Tools
Encryption
Screenshot
Web Design
Web Resources
Backup
Microsoft Windows
Last updated: Jul 17