Installing Dial-Up Networking
If Dial-Up Networking is not ticked, then tick Dial-Up Networking and click on the OK button. You will be prompted to insert your Windows 98 CD, and then Windows copy files to your hard disk. When the files are transferred you will need to reboot your system.
After rebooting you will find a new icon on your desktop called Network Neighborhood.
Configuring Dial-up Networking
Click on Start, Programs, Accessories, then select Dial-up Networking. Double Click on Make New Connection.
Type Netro as the name of the new connection, select your modem from the drop down menu, then click on Next.
Type in the Area Code as 2, and the phone number as 9925 5800 (or 03 9895 0100 for Melbourne. Select Australia from the list of countries.
Click on Next, then Click on Finish
Click on Server Types. The settings should read as follows:
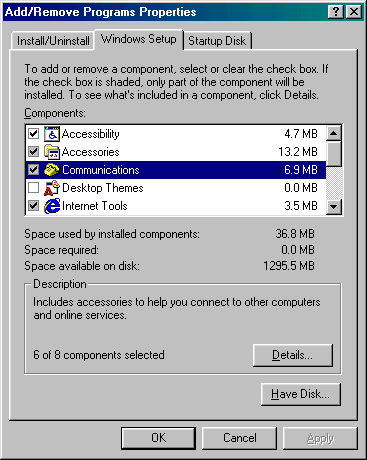 First you must check to see if Dial-Up Networking has already been installed on your system. Go to the Control Panel, Add/Remove programs. Select the Windows Setup tab and click on Communications, then click the button Details.
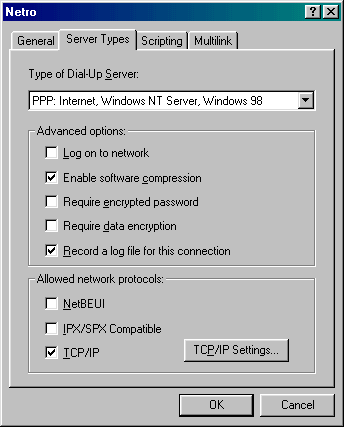 You'll now be back in the Dial-up Networking group. You should see a new connection called Netro. Right-click on this connection, and select properties.
Click on OK