This guide will show you how to set up a permanent or dialup link to Netro using Microsoft's Routing and Remote Access Service ("RRAS"). Further product documentation is available in the RRAS Doc Directory, C:\program files\routing\Doc directory
Downloads
Microsoft
RRAS update for Windows NT (5.7MB)
Download
Microsoft NT Service Pack 5 (32.9 MB)
System Requirements
Before you can install Routing and Remote Access Service, you must have a computer running Windows NT Server version 4.0 with Service Pack 3 or later installed.
You must remove any previous versions of the Remote Access Service (RAS) and MultiProtocol Routing (MPR) version 1 (the RIP for IP, RIP for IPX, and DHCP Relay Agent services) on that computer. You must pause the SNMP Service on your Windows NT Server computer before installing Routing and Remote Access Service.
Please also make sure that the Enable IP Forwarding check box is selected in the TCP/IP settings area in Control Panel, and do not clear it after you install Routing and Remote Access Service. If you do clear it, your router will not function properly.
Installing RRAS
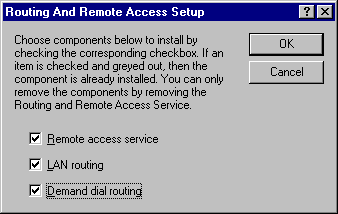
During RRAS (Routing and Remote Access Service) Setup you will be asked which options you wish to install. The only one required is the Demand Dial Routing Options,
however RAS (Remote Access Service) option is recommended so
that you can logon as a backup method whilst implementing or
troubleshooting routing
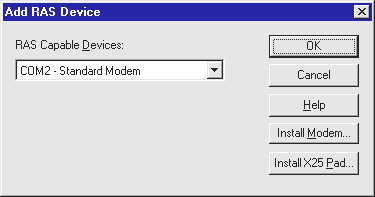
Click on OK, and you will be prompted with the Add RAS device
window
If you already have a modem installed on your computer, then select it from the drop down list, otherwise, click on the Install Modem button, and then click on Next to let NT look for a
Make sure the modem is connected properly and turned on. Follow the instructions as prompted.
If NT doesn't detect your modem (or selects a standard modem type) you may need to manually select your modem type. Browse through the list for your manufacturer and model type.
If your modem is not there, just select the Standard Modem as your modem type, being sure to select the appropriate one for your modem speed. Make sure it is installed to the correct COM port. NT should automatically detect the right port.
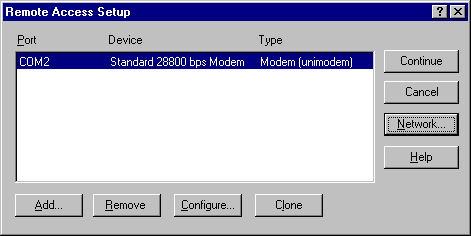
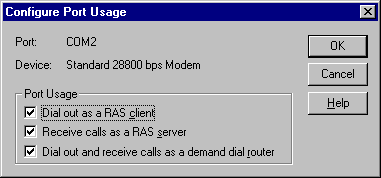
Click on OK, select the COM port that was added and click on Configure.
Only tick the last option, Dial out and receive calls as a demand dial router.
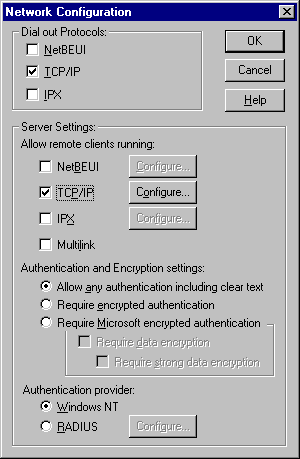
Click on OK, then select Network
Select Allow any authentication including clear text, and ensure that only TCP/IP is set for Dial-out protocols and Server Settings.
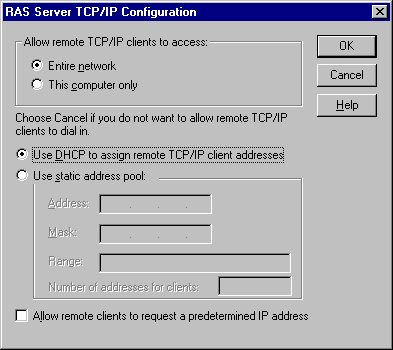
Click on Configure next to TCP/IP. By default it will be using DHCP to assign IP addresses. If you wish to use a static pool then set the range here. The Routing and Remote access Service will use two IP address, one for each interface (Network card and modem).
Click on OK for both windows. Once the installation completes, you will be prompted to restart your machine.
Configuring the Routing and Remote Access Service
The Routing and RAS Admin tool is available at Start, Program, Administrative Tools, Routing and RAS Admin. Once there, click on Server and select Start Router. If the Remote Access server fails to start, check the Windows NT Event Viewer for more information.
You should be prompted to add a new interface. If not, then select LAN and Demand Dial Interfaces, click on the Actions menu and select Add Interface. If the Demand Dial Wizard comes up, select the I know all about demand dial interfaces check box and click on Finish.
Enter the following details for the New Phonebook entry under the General tab:
Interface Name: Netro
These can be disabled if you experience problems or frequent disconnections.
The initial speed should be higher than your modem speed, recommended at 57600.
Click on OK
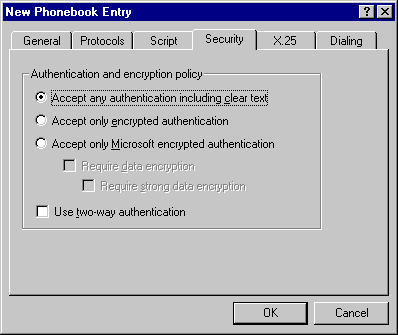
Click on the Security tab and select Use any authentication.
Click on Dialing and select either Persistant connection if you have a dedicated modem link, otherwise set the idle timeout for demand dial connections.
Note on idle timeouts:
Add the Destination and Network Mask as 0.0.0.0, set the Gateway as
Next, go to LAN and Demand Dial Interfaces, right click on Netro and select Set Credentials.
Enter the login name and password for Netro, leave the domain field blank.
Finally, to connect, right click on Netro and select Connect.
Command line scripting and scheduling
To connect via the command line, use the following command:
routemon [\\ComputerName] interface connect Netro
And to disconnect:
routemon [\\ComputerName] interface disconnect Netro
To schedule the service to connect every 2 hours or so (for demand-dial connections), use the at command at the command prompt. The Schedule service must be started.
Example of use:
at 14:00 /EVERY:M,T,W,TH,F "routemon interface connect Netro"
This will connect to Netro every weekday at 2pm. To see what items have been scheduled, type at by itself at the prompt.
Routing and RAS will automatically reconnect if the line drops for any reason. Customers with persitant connections may wish to run a script every night which disconnects and the reconnects, in case the system was unable to reconnect for some reason.
Configuring Services for Automatic startup
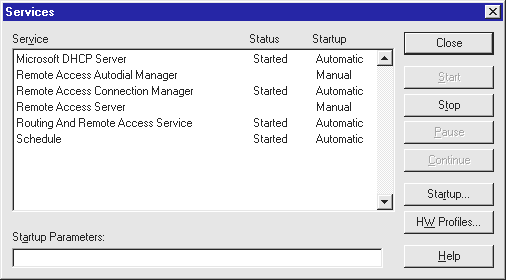
Make sure that you have configured the appropriate services for automatic startup as shown here. This is done through the Services applet in the Control Panel.
Phone Number: 9925 5800
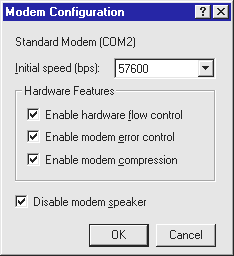 In the Connect Using box, select your modem and click on Configure. Make sure Flow Control is used, also select error control and modem compression if your modem supports it.
If the users on your LAN have services which periodically poll the server (eg: checking for mail every 10 minutes etc) then this will restart the idle timeout counter.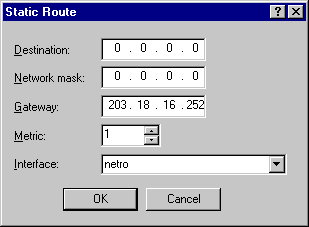 The final step is to set a static route. To do this, click on the + sign next to IP Routing, click on Static Routes, and then select Add Static Route from the Action menu.
